Connection Guide
Connect your Mirth instance to Synura over MLLPS. This takes about 10 minutes.
Prerequisites
Section titled “Prerequisites”Before you begin, confirm you have:
- Your Synura subdomain (e.g.
acme), provided during onboarding - Mirth Connect installed and accessible (note your version number)
- Outbound network access from the Mirth server to
synura.ioon port 443 - A Synura dashboard account to verify message delivery
Your connection endpoint is:
Host: {subdomain}.synura.ioPort: 443Protocol: MLLPS (MLLP wrapped in TLS 1.2+)Replace {subdomain} with the value assigned to your organisation by Synura.
Step 1: Check Your Environment
Section titled “Step 1: Check Your Environment”Run these two scripts on your Mirth server to confirm your version and network connectivity.
Detect Mirth Version
Section titled “Detect Mirth Version”Linux / macOS:
./scripts/detect-version.shWindows (PowerShell):
.\scripts\detect-version.ps1Note the version number. You’ll need it in Step 2.
Test Network Connectivity
Section titled “Test Network Connectivity”Linux / macOS:
./scripts/test-network.sh {subdomain}.synura.ioWindows (PowerShell):
.\scripts\test-network.ps1 {subdomain}.synura.ioA successful run shows a completed TLS handshake. If the test fails, see Troubleshooting.
Step 2: Choose Your Connection Path
Section titled “Step 2: Choose Your Connection Path”Synura requires MLLPS (MLLP wrapped in TLS) on port 443. Mirth’s open-source TCP Sender doesn’t support TLS. We provide a free TLS proxy that handles encryption for you — no plugins to buy, no licence fees.
Pick the path that matches your environment:
| Path | Who It’s For | What You Need |
|---|---|---|
| Path A: Synura TLS Proxy | Most customers | Our free installer — works on all Mirth versions |
| Path B: NextGen SSL Manager | Customers with a commercial Mirth licence that includes SSL Manager | Your existing SSL Manager plugin |
| Path C: Zen SSL Extension | Customers who have purchased the Zen SSL Extension | Your existing Zen SSL plugin |
| Path D: Enterprise TLS Proxy | Organisations with existing TLS infrastructure (F5, HAProxy, etc.) | Your IT team configures the proxy |
Not sure which path? If you are running the open-source (free) version of Mirth Connect — which most organisations are — use Path A. It takes less than a minute.
Path A: Synura TLS Proxy (Recommended)
Section titled “Path A: Synura TLS Proxy (Recommended)”We provide a free TLS proxy that works with every Mirth version. One installer. No plugins. No licence fees.
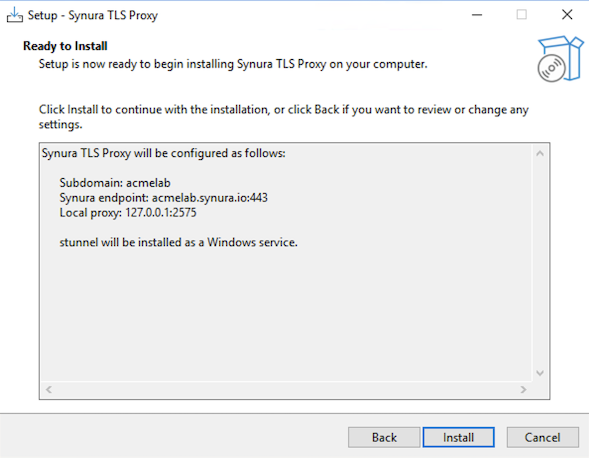
Mirth sends plain MLLP to localhost:2575. The proxy encrypts the connection and forwards it to {subdomain}.synura.io:443.
Mirth (plain MLLP) --> localhost:2575 --> Synura TLS Proxy --> {subdomain}.synura.io:443 (MLLPS)Windows
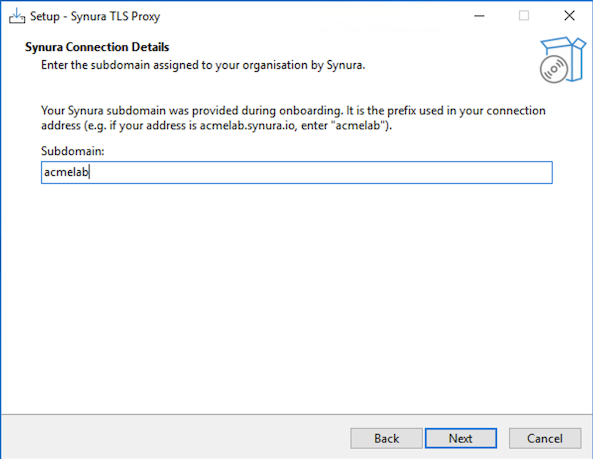
Section titled “Windows”Option 1: Installer (recommended)
Download and run SynuraTLSProxy-Setup.exe. Enter your subdomain when prompted. The wizard handles the rest.
Option 2: PowerShell script
.\scripts\setup-stunnel.ps1 -Subdomain acmelabLinux / macOS
Section titled “Linux / macOS”sudo ./scripts/setup-stunnel.sh --subdomain acmelabVerify the Proxy Is Running
Section titled “Verify the Proxy Is Running”Confirm the proxy is listening:
# Linux / macOSnetstat -tlnp | grep 2575
# Windows (PowerShell)Get-Service stunnel
You should see a listener on 127.0.0.1:2575.
Configure Mirth
Section titled “Configure Mirth”- Open the Mirth Connect Administrator.
- Create a new channel (or open your existing outbound channel). See Mirth Channel Setup for detailed steps.
- On the Destination tab, select TCP Sender as the connector type.
- Set Transmission Mode to MLLP.
- Set the connection settings:
- Remote Address:
localhost - Remote Port:
2575
- Remote Address:
- Do not enable TLS/SSL on the Mirth connector — the proxy handles encryption.
- Save and Deploy the channel.
Proceed to Step 3: Verify.
Path B: NextGen SSL Manager Plugin
Section titled “Path B: NextGen SSL Manager Plugin”If your commercial Mirth licence includes SSL Manager, configure TLS directly on the TCP Sender. No proxy required.
SSL Manager is a paid NextGen extension (Silver/Gold/Platinum subscriptions). It is not part of the open-source Mirth download. Synura does not provide or support this plugin.
- Open the Mirth Connect Administrator.
- Create a new channel. See Mirth Channel Setup for the channel structure.
- On the Destination tab, select TCP Sender with MLLP transmission mode.
- Set the connection settings:
- Remote Address:
{subdomain}.synura.io - Remote Port:
443
- Remote Address:
- Enable TLS/SSL using the SSL Manager settings on the connector.
- Ensure the minimum TLS version is set to TLS 1.2.
- Save and Deploy the channel.
For SSL Manager configuration details, refer to the NextGen SSL Manager User Guide or contact NextGen support.
Proceed to Step 3: Verify.
Path C: Zen SSL Extension
Section titled “Path C: Zen SSL Extension”If you have the Zen SSL Extension from ConsultZen, configure TLS directly on the TCP Sender.
Zen SSL is a third-party commercial plugin (annual subscription). Synura does not provide or support it. Details at https://consultzen.com/zen-ssl-extension/
- Open the Mirth Connect Administrator.
- Create a new channel. See Mirth Channel Setup for the channel structure.
- On the Destination tab, use the Zen SSL-enabled TCP/LLP Sender connector.
- Set the connection settings:
- Remote Address:
{subdomain}.synura.io - Remote Port:
443
- Remote Address:
- Enable TLS in the Zen SSL connector settings.
- Ensure the minimum TLS version is set to TLS 1.2.
- Save and Deploy the channel.
For Zen SSL configuration details, refer to the ConsultZen documentation.
Proceed to Step 3: Verify.
Path D: Enterprise TLS Proxy
Section titled “Path D: Enterprise TLS Proxy”If your organisation runs a TLS termination proxy (F5, HAProxy, nginx, etc.), your infrastructure team can forward MLLP traffic to Synura directly.
Hand your IT team these configuration values:
| Setting | Value |
|---|---|
| Listen address | localhost (or an internal IP accessible to the Mirth server) |
| Listen port | 2575 (or any available port) |
| Upstream host | {subdomain}.synura.io |
| Upstream port | 443 |
| Protocol | TLS 1.2 or higher |
| SNI | Required — must send {subdomain}.synura.io as the SNI hostname |
| Client certificate | Not required (server-side TLS only) |
SNI is required. Without it, Synura will reject the connection. SNI is how we route traffic to your tenant.
Once the proxy is running, configure Mirth to send to localhost:2575 (or whichever address and port the proxy listens on). See Mirth Channel Setup for the Mirth channel setup — use the same settings as Path A.
Proceed to Step 3: Verify.
Step 3: Verify
Section titled “Step 3: Verify”Send a Test Message
Section titled “Send a Test Message”- In the Mirth Dashboard, select your deployed channel.
- Click Send Message.
- Paste a valid HL7 v2 test message (e.g. an ADT^A01) and click Process Message.
Confirm Delivery
Section titled “Confirm Delivery”- In Mirth: The message status should show SENT. The response should contain an AA (Application Accept) acknowledgement.
- In Synura: Log into the Synura dashboard and confirm the message appears in your inbound message log.
If Something Goes Wrong
Section titled “If Something Goes Wrong”Run the diagnostic bundle script on your Mirth server:
Linux / macOS:
./scripts/diagnostic-bundle.shWindows (PowerShell):
.\scripts\diagnostic-bundle.ps1This collects Mirth version info, network results, stunnel status and recent logs into a single file. Send it to Synura support with your subdomain.
See Troubleshooting for common issues.
Troubleshooting
Section titled “Troubleshooting”| Symptom | Likely Cause | Quick Fix |
|---|---|---|
| Connection refused on localhost:2575 | Synura TLS Proxy (stunnel) is not running | Check the service status and restart it. See Troubleshooting. |
| TLS handshake failed | Certificate issue or TLS version mismatch | Run diagnostic-bundle and check TLS output. Ensure TLS 1.2+ is in use. |
| Connection timeout | Firewall blocking outbound port 443 | Run test-network script. Ask your network team to allow outbound TCP 443 to synura.io. |
| Message sent but no ACK | Mirth response timeout too short, or sending facility not configured in Synura | Increase response timeout in Mirth. Verify your sending facility is registered in the Synura dashboard. |
For detailed troubleshooting steps, see Troubleshooting.
Support
Section titled “Support”If you need help at any point, contact support@synura.io with your subdomain and the output of the diagnostic-bundle script.