Manual Setup
This guide walks through every component the installer would normally configure for you. Use this path if your security team requires manual review of each step, or if you want to understand the architecture before it runs.
The result is identical to the Quick Start — a Mirth channel that polls Synura for messages over a secure TLS tunnel.
Architecture overview
Section titled “Architecture overview”Mirth Connect stunnel Synura┌──────────────┐ ┌──────────────────┐ ┌─────────────────────┐│ JavaScript │ │ TLS proxy │ │ Synura Connect ││ Reader polls │─MLLP─│ localhost:6661 │─TLS──│ subdomain.synura.io ││ every 5 min │ │ client mode │ 1.3 │ port 443 │└──────────────┘ └──────────────────┘ └─────────────────────┘- The Mirth channel sends a QBP^Q11 query (HL7 mailbox drain request) via plain MLLP to
localhost:6661 - stunnel encrypts the connection and forwards it to
{subdomain}.synura.io:443over TLS 1.3 - Synura responds with an RSP^K11 containing any queued messages
- The channel extracts the HL7 payloads and presents them as received messages in the Mirth dashboard
No inbound ports are opened. No firewall changes are needed. All traffic is outbound on port 443.
Prerequisites
Section titled “Prerequisites”- Mirth Connect 3.8.1 or later installed and running
- Oracle JDK 8 installed (includes
javawsfor Mirth Administrator) - Administrator access on the Mirth server
- Outbound TCP 443 from the Mirth server to
synura.io - Your Synura subdomain and sending facility code
Step 1: Install stunnel
Section titled “Step 1: Install stunnel”stunnel is a free, open-source TLS proxy. It wraps plain MLLP traffic in TLS so your Mirth instance can communicate securely with Synura without commercial plugins.
Windows
Section titled “Windows”- Download the stunnel Windows installer from stunnel.org/downloads.html (the 64-bit
.exeinstaller). - Run the installer. Accept the defaults — it installs to
C:\Program Files (x86)\stunnel\. - stunnel registers itself as a Windows service automatically.
# Debian/Ubuntusudo apt-get install stunnel4
# RHEL/CentOSsudo yum install stunnel
Step 2: Configure stunnel
Section titled “Step 2: Configure stunnel”Create or replace the stunnel configuration file.
Windows
Section titled “Windows”Edit C:\Program Files (x86)\stunnel\config\stunnel.conf:
[synura]client = yesaccept = 127.0.0.1:6661connect = {subdomain}.synura.io:443Replace {subdomain} with your assigned Synura subdomain (e.g. acmelab).
Edit /etc/stunnel/synura.conf:
[synura]client = yesaccept = 127.0.0.1:6661connect = {subdomain}.synura.io:443Step 3: Start stunnel
Section titled “Step 3: Start stunnel”Windows
Section titled “Windows”Start-Service stunnelSet-Service stunnel -StartupType AutomaticVerify it is listening:
netstat -an | findstr 6661You should see LISTENING on 127.0.0.1:6661.
sudo systemctl enable stunnel4sudo systemctl start stunnel4ss -tlnp | grep 6661Step 4: Test the TLS tunnel
Section titled “Step 4: Test the TLS tunnel”Before configuring Mirth, verify the tunnel works.
Windows (PowerShell)
Section titled “Windows (PowerShell)”Test-NetConnection 127.0.0.1 -Port 6661Expected result: TcpTestSucceeded : True
From any machine with OpenSSL
Section titled “From any machine with OpenSSL”echo | openssl s_client -connect {subdomain}.synura.io:443 -servername {subdomain}.synura.io 2>&1 | head -10You should see CN=*.synura.io in the certificate chain. If you see a TLS error, check Troubleshooting.
Step 5: Import the TLS root certificate
Section titled “Step 5: Import the TLS root certificate”Mirth’s Java runtime needs to trust the Let’s Encrypt certificate authority. Most modern Java installations already include it, but older versions may not.
Locate the keytool binary in your Java installation:
# Windows — typically:"C:\Program Files\Java\jdk1.8.0_431\bin\keytool.exe"Check if the cert is already trusted:
keytool -list -keystore "C:\Program Files\Java\jdk1.8.0_431\jre\lib\security\cacerts" -storepass changeit -alias "isrg-root-x1"If it is already present, skip to Step 6.
If it is not present, import it. The Synura installer package includes the certificate at certs/isrg-root-x1.pem:
keytool -importcert -noprompt -trustcacerts -alias "isrg-root-x1" ` -file "C:\path\to\mirth-installer\certs\isrg-root-x1.pem" ` -keystore "C:\Program Files\Java\jdk1.8.0_431\jre\lib\security\cacerts" ` -storepass changeitAlternatively, download the ISRG Root X1 certificate directly from letsencrypt.org/certificates/.
Step 6: Create the Mirth channel
Section titled “Step 6: Create the Mirth channel”Open the Mirth Connect Administrator and create a new channel.
Summary tab
Section titled “Summary tab”| Field | Value |
|---|---|
| Name | Synura - Mailbox Poller |
| Description | Polls Synura for messages via QBP^Q11 over MLLP/TLS |

Source tab
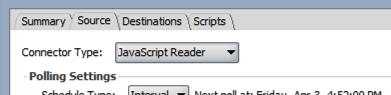
Section titled “Source tab”- Set Connector Type to JavaScript Reader.
- Set the Poll Interval to
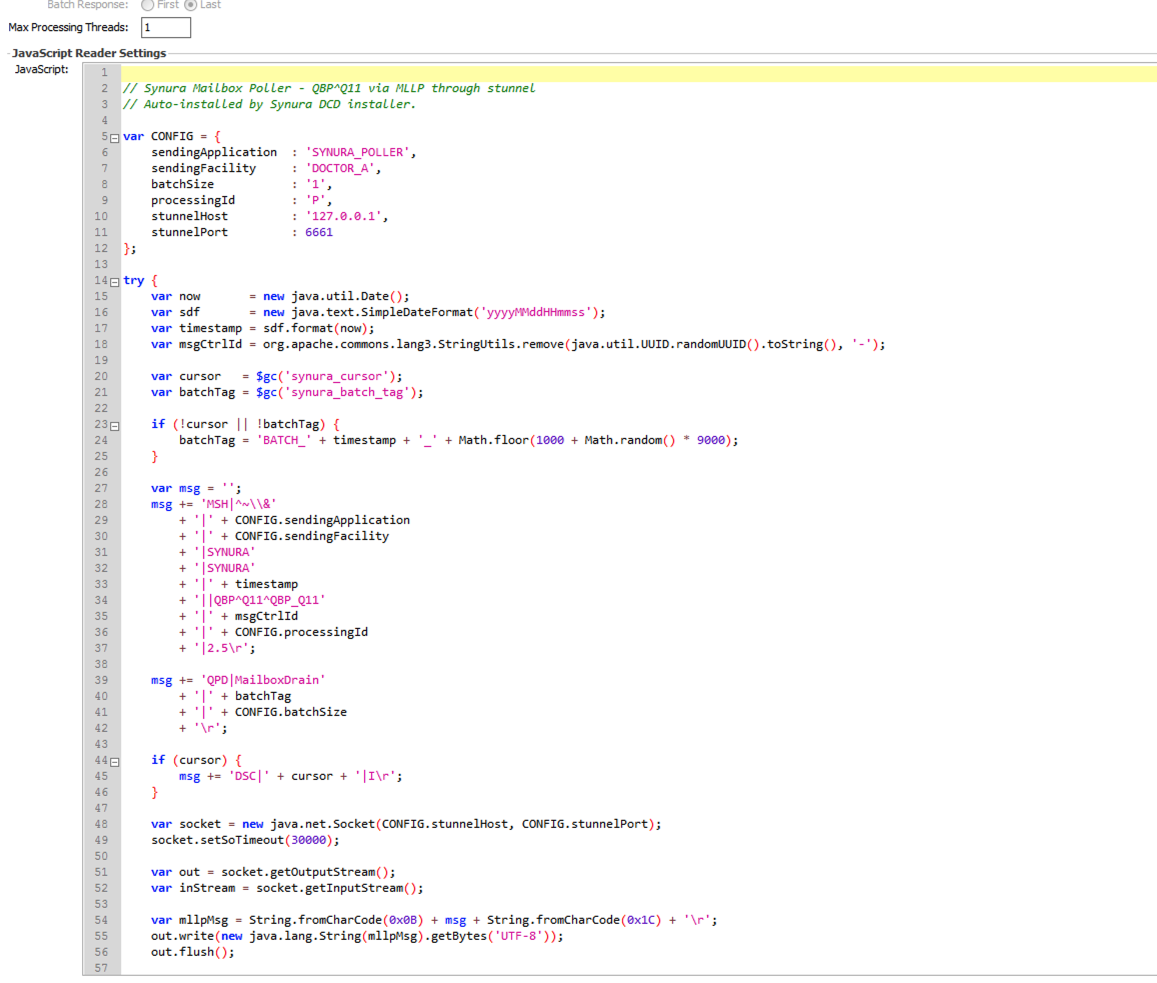
300000(5 minutes in milliseconds). Adjust as needed — lower values poll more frequently. - Paste the following JavaScript into the Script field:
var CONFIG = {    sendingApplication  : 'SYNURA_POLLER',    sendingFacility     : 'YOUR_FACILITY_CODE',    batchSize           : '1',    processingId        : 'P',    stunnelHost         : '127.0.0.1',    stunnelPort         : 6661};
try {    var now       = new java.util.Date();    var sdf       = new java.text.SimpleDateFormat('yyyyMMddHHmmss');    var timestamp = sdf.format(now);    var msgCtrlId = org.apache.commons.lang3.StringUtils.remove(        java.util.UUID.randomUUID().toString(), '-');
    var cursor   = $gc('synura_cursor');    var batchTag = $gc('synura_batch_tag');
    if (!cursor || !batchTag) {        batchTag = 'BATCH_' + timestamp + '_'            + Math.floor(1000 + Math.random() * 9000);    }
    var msg = '';    msg += 'MSH|^~\\&'        + '|' + CONFIG.sendingApplication        + '|' + CONFIG.sendingFacility        + '|SYNURA|SYNURA'        + '|' + timestamp        + '||QBP^Q11^QBP_Q11'        + '|' + msgCtrlId        + '|' + CONFIG.processingId        + '|2.5\r';
    msg += 'QPD|MailboxDrain'        + '|' + batchTag        + '|' + CONFIG.batchSize        + '\r';
    if (cursor) {        msg += 'DSC|' + cursor + '|I\r';    }
    var socket = new java.net.Socket(        CONFIG.stunnelHost, CONFIG.stunnelPort);    socket.setSoTimeout(30000);
    var out = socket.getOutputStream();    var inStream = socket.getInputStream();
    var mllpMsg = String.fromCharCode(0x0B) + msg        + String.fromCharCode(0x1C) + '\r';    out.write(new java.lang.String(mllpMsg).getBytes('UTF-8'));    out.flush();
    var buffer = new java.io.ByteArrayOutputStream();    var b;    var foundFS = false;    while ((b = inStream.read()) !== -1) {        if (b === 0x1C) { foundFS = true; continue; }        if (foundFS && b === 0x0D) { break; }        if (b !== 0x0B) { buffer.write(b); }    }    socket.close();
    // IMPORTANT: Coerce Java String to JavaScript string    var response = '' + buffer.toString('UTF-8');
    if (response.length > 0) {        var segments = response.split('\r');        var qakSeg = null;        var obxSeg = null;        var dscSeg = null;
        for (var i = 0; i < segments.length; i++) {            var seg = segments[i];            if (seg.indexOf('QAK') === 0) qakSeg = seg;            if (seg.indexOf('OBX') === 0) obxSeg = seg;            if (seg.indexOf('DSC') === 0) dscSeg = seg;        }
        if (qakSeg) {            var qakFields = qakSeg.split('|');            var qakStatus = qakFields[2];
            if (qakStatus === 'OK' && obxSeg) {                var obxFields = obxSeg.split('|');                var msgId = obxFields[3] || 'unknown';                var rawPayload = '';                for (var k = 5; k < obxFields.length; k++) {                    if (k > 5) rawPayload += '|';                    rawPayload += obxFields[k];                }                // IMPORTANT: Coerce Java String to JavaScript string                var payload = '' + org.apache.commons.lang3.StringUtils                    .replace(rawPayload, '~', '\r');                logger.info('Synura poll: received ' + msgId);
                if (dscSeg) {                    var dscFields = dscSeg.split('|');                    $gc('synura_cursor', dscFields[1]);                    $gc('synura_batch_tag', qakFields[1]);                } else {                    // IMPORTANT: Use empty string, not null                    $gc('synura_cursor', '');                    $gc('synura_batch_tag', '');                }
                return payload;            }        }    }} catch (e) {    logger.error('Synura poll error: ' + e.toString());}
return null;
Before saving, replace YOUR_FACILITY_CODE with your sending facility code (the MSH-4 value registered with Synura).
Source Settings
Section titled “Source Settings”Ensure these settings:
| Setting | Value |
|---|---|
| Process Batch | No |
| Source Queue | OFF (Respond after processing) |

Destination tab
Section titled “Destination tab”Leave the default Channel Writer destination. Messages will appear in the Mirth dashboard. You can route them to a file writer, database writer, or another channel as needed.
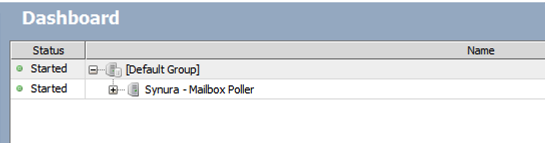
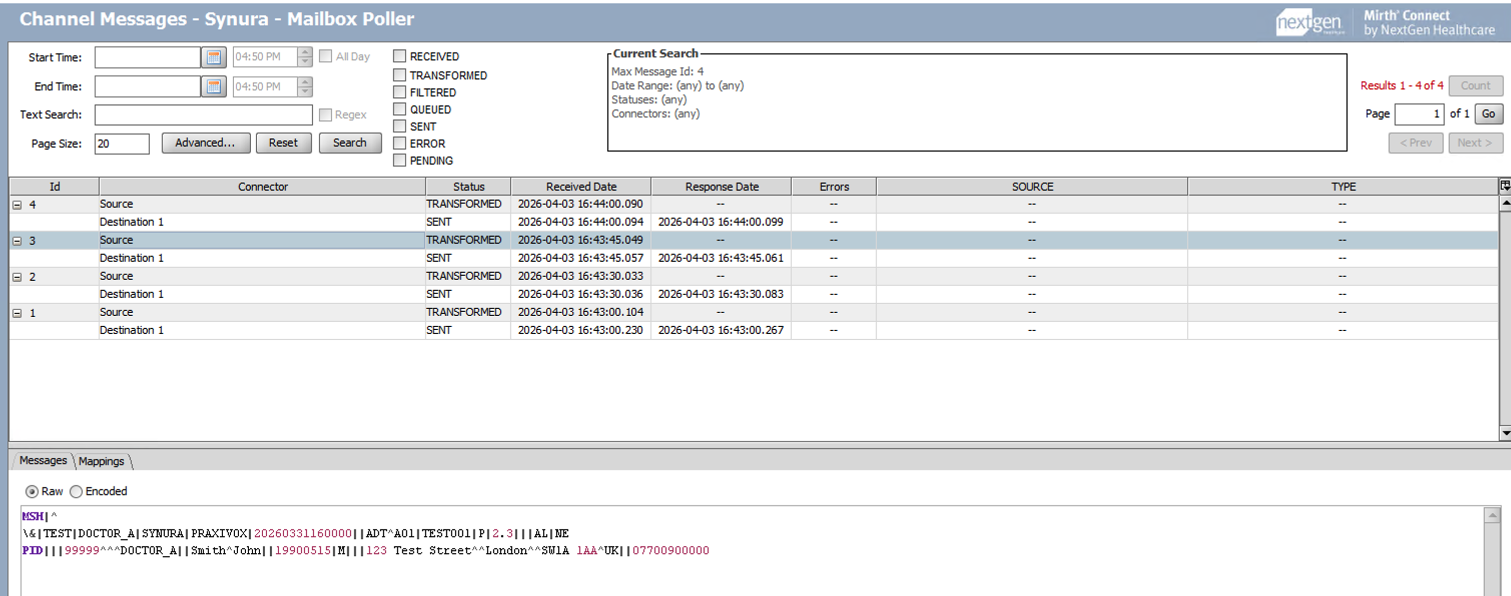
Step 7: Deploy and verify
Section titled “Step 7: Deploy and verify”- Click Save Changes.
- Go to the Dashboard.
- Select the channel and click Deploy Channel.
- Status should show Started.
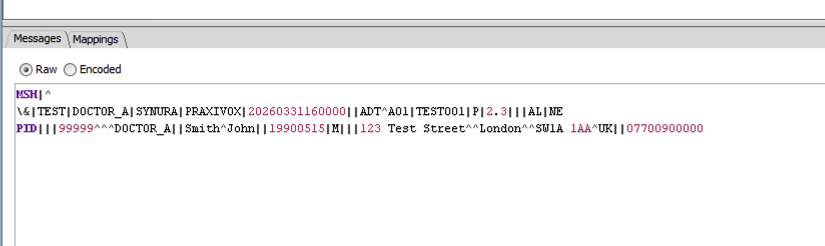
The channel polls Synura on the interval you configured. When messages are waiting:
- The Received count increments
- Messages appear in the channel’s Messages tab
- The Server Log shows entries like
Synura poll: received MAILBOX^{message-id}
When the mailbox is empty, the channel polls silently with no log output.


How polling works
Section titled “How polling works”The channel requests one message per poll using a QBP^Q11 query. If more messages are waiting, Synura includes a continuation token in the response. The channel automatically sends follow-up requests using that token until the mailbox is drained.
At a 5-minute poll interval, the channel drains up to 60 messages per hour. For higher throughput, reduce the poll interval — 5 seconds has been tested and works reliably (720+ messages/hour).
Technical notes for Mirth 3.8.1
Section titled “Technical notes for Mirth 3.8.1”If you are writing or modifying the channel JavaScript on Mirth 3.8.1, be aware of these Rhino engine behaviours:
- Java String coercion:
buffer.toString('UTF-8')andStringUtils.replace()return Java Strings, not JavaScript strings. Always prefix with'' +before calling.split(),.indexOf(), or checking.length. Without this,.split('|')[2]returnscharAt(2)instead of the third array element. .lengthnot.length(): After coercion to a JavaScript string, use.length(property), not.length()(method).$gcdoes not accept null:$gc('key', null)throws a NullPointerException. Use$gc('key', '')(empty string) instead.- Batch processing is not supported: Do not enable Process Batch on the source connector. The Rhino engine cannot return multiple messages from a JavaScript Reader. Use
batchSize=1with DSC continuation instead.
Next steps
Section titled “Next steps”- Troubleshooting if the channel is not receiving messages
- Connection Guide for alternative TLS paths (commercial plugins, enterprise proxies)