Quick Start
There are three ways to get HL7 flowing through Synura. The right one depends on what you have running today. Read the one-line test under each branch and follow the path that matches.
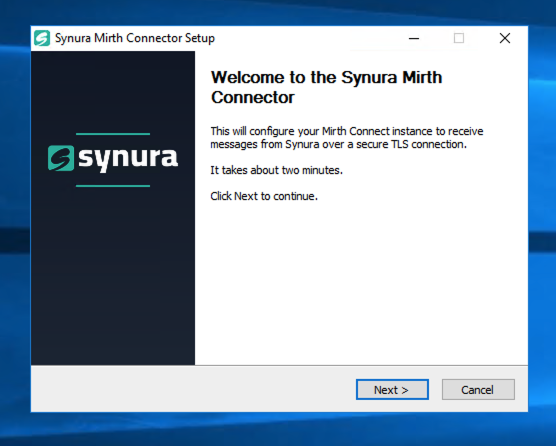
If you are not sure, start with Synura Connect. It is the simplest setup, available on Windows today. Other platforms are on the backlog, email hello@synura.io if you need one. You can switch later, your Synura account, endpoints and rules stay the same.
Synura Connect
Section titled “Synura Connect”Take this branch if you do not have an integration engine running yet, or you want the simplest possible install on a host inside your network.
Synura Connect is a small agent that runs as a service. It opens an outbound TLS tunnel to Synura and exposes a local MLLP listener that your sending systems point at. No inbound firewall changes, no VPN, no static IPs to manage.
Setup outline
- Download the Synura Connect installer for your platform from the Downloads page.
- Run the installer. Provide your Synura subdomain (e.g.
acmelab), your API key from the Synura dashboard, and your sending-facility code (MSH-4). - The installer registers the service, opens the tunnel and prints your local MLLP listener address.
- Point your sending system at the local listener.
- Confirm the first message arrives in your Synura dashboard.
Success looks like: your dashboard shows the inbound message with the right sending-facility code, an AA ACK back to your sender and an audit-log entry on the delivery.
For full setup detail see the Connection Guide.
Existing Mirth
Section titled “Existing Mirth”Take this branch if you already run Mirth Connect 3.8.1 or later in production. The Synura Mirth Connector turns your existing Mirth instance into a Synura ingress without touching your existing channels.
The installer configures stunnel as a TLS proxy, imports the certificate trust chain into the Java truststore, and deploys the Synura - Mailbox Poller channel. Your other Mirth channels keep running.
Setup outline
- Confirm prerequisites: Mirth Connect 3.8.1 or later running, Oracle JDK 8 installed (
javawsis needed for Mirth Administrator), administrator access on the Mirth host, outbound network access tosynura.ioon port 443. - Download the bundle for your platform. Windows: SynuraMirthConnector-windows.zip (3.7 MB). Linux: SynuraMirthConnector-linux.tar.gz (10 KB). Extract the archive then run the installer from inside the extracted folder.
- Run the installer. Provide your Synura subdomain, API key, sending-facility code (MSH-4) and Mirth admin password.
- The installer detects your Mirth, installs and configures stunnel, imports the Let’s Encrypt root, and deploys the poller channel.
- Open Mirth Administrator and confirm the Synura - Mailbox Poller channel is Started.
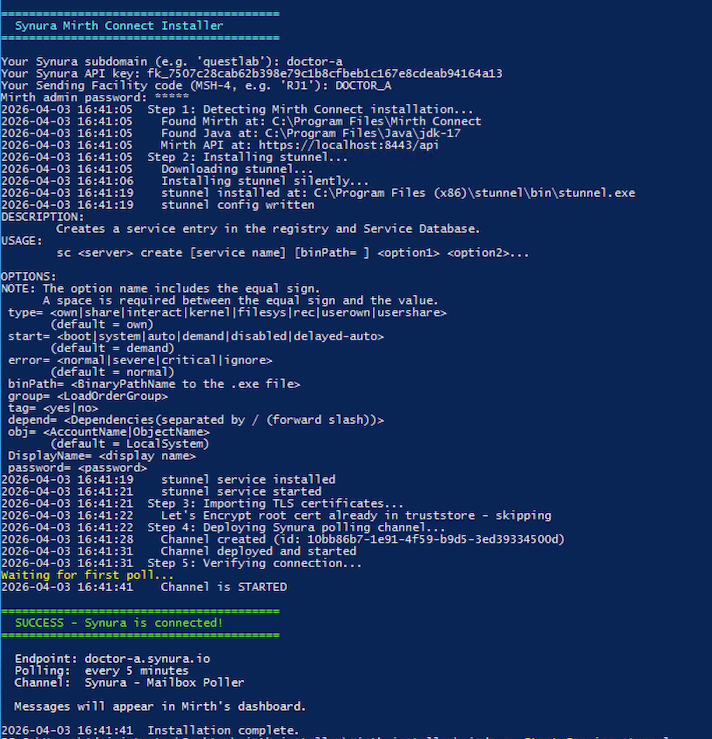

Success looks like: the poller channel reads Started in your Mirth dashboard. The first inbound message increments the channel’s Received count and lands in your Synura audit log.
For step-by-step detail and the full troubleshooting tree see Manual Setup, Connection Guide and TLS Troubleshooting.
Native HTTPS or MLLP
Section titled “Native HTTPS or MLLP”Take this branch if you run your own integration engine (Cloverleaf, Rhapsody, Iguana, NextGen Connect, custom) and you want to send directly to Synura over HTTPS or MLLP/TLS.
Synura accepts inbound HL7 v2 over HTTPS POST and over MLLP wrapped in TLS. Routing is by MSH-3 (ReceivingApplication) and MSH-4 (ReceivingFacility) by default, configurable per source.
Setup outline
- From the Synura dashboard, create or pick the source endpoint and copy the endpoint URL or MLLP host:port.
- In your integration engine, configure an outbound destination pointing at that URL or host:port. Use TLS 1.2 or higher.
- Set MSH-3 and MSH-4 on outbound messages to match the routing values your Synura account expects.
- Trust the Let’s Encrypt root in your engine’s truststore (most engines trust it by default).
- Send a test message and watch your Synura dashboard.
Success looks like: the test message appears in your audit log with the correct routing, an AA ACK returns to your engine, and the destination endpoint receives the payload.
For HTTPS request and response shapes see HTTPS API. For MLLP/TLS specifics see Native MLLP/TLS.
Where to go next
Section titled “Where to go next”Once a first message is flowing, the rest of the docs cover the platform in depth.
- Connection Guide — alternative TLS paths and trust setup
- FHIR Translation — translation rules, mapping profiles, Z-segments
- Connecting — endpoint and routing reference
- Code Samples — example payloads and client snippets
- Troubleshooting — when something is not working